


A portlight is usually a square or rectangular window on the exterior of the vessel. Depending on the window type, you may or may not open them. On the other hand, a porthole is typically a round window. It is smaller than the portlight. Although the shapes of both the windows are different, their installation process is similar. Plus, the components that come with these windows are generally the same. This is why you need to learn how to install any one of them.
When it comes to the installation process, you must know that it is pretty easy. All you need to do is to follow the steps mentioned below to replace your boat’s window. So, let’s discuss what you need to avoid and what you need to do to install a new window for your boat.
Step#1: Make a Template
The first thing you need to do is to make a template of your portlight. This will help you determine what size portlights you need for your boat. In this case, you need to trace the outline. Make sure to trace the porthole from the inside of your boat. For this purpose, you can use any paper that is easy to handle while you are tracing. Once you do that, you can inquire with Marine Depot Direct for a quote on custom size portlights that will fit your specific measurements.
Step#2: Check the Boat Window
Once you receive your portlight, make sure to verify the size of the window. There are low chances of any error if you have purchased it from Marine Depot Direct due to their extensive size confirmation process before ordering.
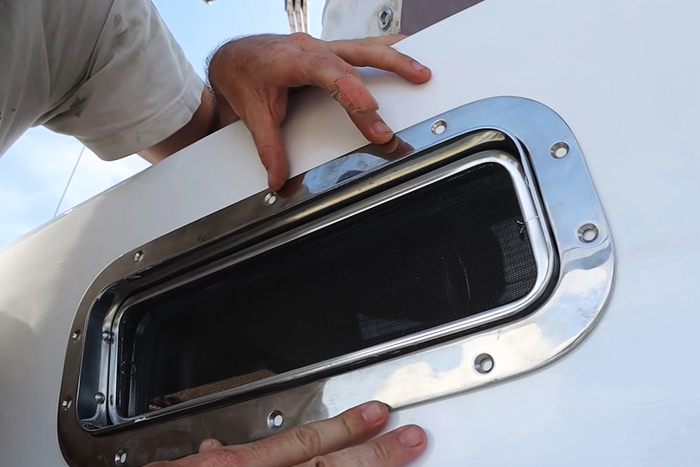
Step#3: Remove Screws
Now it’s time to start working. You need to remove the screws of your older portlight. It is important to understand that after removing the screws, the portlight will not come out easily.
Step#4: Cut the Caulk
You need to cut through the caulk seam by using a utility knife. In addition to that, you can use wooden wedges for removing the trim. Gently push the wooden piece in the corners of the trim so that they get stuck in it.
Step#5: Use Braided Wire
You need to use braided wire or guitar string to take out the window. Start inserting wire at the lower corner. Now pull it towards yourself with a back and forth motion. Now, loosen the exterior trim with the knife. You can again use wooden wedges for removing the trim. At this point, you can easily remove the interiors of the portlight. Make sure to remove both the interior and exteriors parts of your portlight.
Step#6: Scrape the Caulk
Once you remove the window, you will notice some elements and pieces resting on the hollow area of your boat. You need to scrape the caulk to clean the entire surface. Once you scrape out every tiny element, clean the area to ensure nothing is left on the surface.
Step#7: Test the fit
Many portlights come with the seal of a rubber gasket present at the outside flange. They are clamped in place with the help of screws present inside the flange. You also need to make sure that the mounting surface of the portlights is flat. When you fit the window, any gap around the flange is not more than 1/16 inch.
Step#8: Use the Sealant
Depending on your window, you need to seal the outside flange onto a bed of sealant. This helps you to seal or bond the window; in this case, an excellent bedding option for you is butyl tape. You also need to use liquid sealant for an even stronger hold. Place this sealant into the underside of the flange. But before applying the sealant and tape, make sure to wipe out the boat and flange from the alcohol to remove all the oily contamination. This will help you install the window accurately and without any error.
Step#9: Install the Window
It’s now time to install your new portlight. Make sure to apply the sealant as we have mentioned. Do this process slowly to avoid any problem in the process. If you think you will not be able to do this task correctly, you can take help from a professional at your local boat yard. But even if you have little experience maintaining your boat, this project is typically one you can do yourself.
Step#10: Remove the Sealant
When you place your window, you will notice sealant coming out from the sides of the window. This is the extra sealant that comes out when you push the window into the hole. Of course, it will not look appealing, and you need to remove it. You can easily trim away this sealant with a plastic blade. Gradually clean the entire squeezed-out material.
Many people use a lesser amount of sealant to avoid scrapping it off later. However, it’s not a great idea. If you do this, you can't fix your window accurately, and there will be a chance of water getting into your boat. This is why you should generously the sealant for your boat’s security and safety.
Bottom Line
Now, you have a better idea of the installation process of your boat window. Not to mention, you now know the procedure is easy, and you can do it in a single day. It is vital to keep in mind that you need to follow every step while replacing portholes or portlights if you want great end results. However, if you avoid any of the steps, you may face problems in the future, or experience damage soon after you install it.
Sources
https://bit.ly/3dvjEB4
https://bit.ly/2RGclxO
https://bit.ly/3apkr4l
https://bit.ly/3aqNu7F